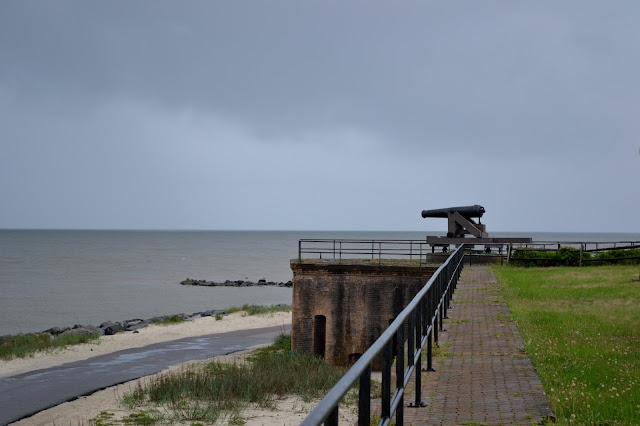
While on a visit to a few beaches on the United States gulf coast, I found out that two historic forts on either side of Mobile Bay were in the vicinity of the place we had chosen to call home for the duration of our stay. One of them, Historic Fort Gaines, was on Dauphin island. Going there had added advantages, a refreshing ferry ride from Fort Morgan to Dauphin Island, a hike through the Audubon Bird Sanctuary for a chance to see some migratory birds, and visiting the historic fort.
Once off the ferry, Fort Gaines is only a little distance up the road. It is a well preserved masonry fort from the Civil War era.
A sign with two cannons under it stands at the entrance of the fort. The fort is designed in the shape of a pentagon and was established in 1821. It was named after Edmund Pendleton Gaines, a distinguished United States army officer. You can read more about the history of the fort here and here.
As you get to the entrance, you see a moat surrounding the castle with a concrete version of a drawbridge to welcome visitors.
A nice gift shop is on the left and after paying an entry fee, it was time to explore! Once inside, there is a central courtyard with several buildings on the periphery. Five of the original brick buildings of the fort still stand.
The Officer's kitchen, with a sign explaining the layout of the structure. There was also a bakery adjacent to it.
A fireplace and some kitchen utensils on a shelf in the brick-walled kitchen.
As I was looking around, storms were threatening to roll in. The sky had turned an ominous grey. It began to rain, large drops peltering down, water collecting in open areas. Looking out into the courtyard where a lone bell hung on a post, rain pounded down heavily. That added to charm of the historic site.
As soon as it subsided a little, I resumed my exploration, and decided to climb up the stairs you see at a distance in the picture.
On getting up to the top, you get a great view of the gulf. You also see interesting design details. Original cannons used in the Battle of Mobile Bay during the Civil War still stand on bastions at the corners of the five sided structure.
Turning around, you see another corner overlooking Mobile Bay, where another cannon stands.
A view from the wall of the fort with a cannon atop a bastion.
Stairs leading down from the top into the heart of the bastion.
A sign explains that this was where the powder, shells and shots were stored during the American Civil War, and smaller, insulated, rooms inside these rooms were used to store shells and shots to protect them from the dampness that seeped in from the bricks.
There are interconnecting brick lined tunnels, this one connecting to the courtyard.
Looking back into the tunnel from the courtyard. The design is so intriguing.
There is a blacksmith's workroom nearby where a blacksmith demonstrates his skills to visitors who ask for a tour. Historic reenactment events are also regularly held at the fort. Here, a cannon shot had just been fired after one such event.
The fort is threatened by tropical storms, hurricanes and also sand dune erosion. It is listed as one of the top eleven endangered historic battlefields from the American Civil War period.
Once off the ferry, Fort Gaines is only a little distance up the road. It is a well preserved masonry fort from the Civil War era.
A sign with two cannons under it stands at the entrance of the fort. The fort is designed in the shape of a pentagon and was established in 1821. It was named after Edmund Pendleton Gaines, a distinguished United States army officer. You can read more about the history of the fort here and here.
As you get to the entrance, you see a moat surrounding the castle with a concrete version of a drawbridge to welcome visitors.
A nice gift shop is on the left and after paying an entry fee, it was time to explore! Once inside, there is a central courtyard with several buildings on the periphery. Five of the original brick buildings of the fort still stand.
The Officer's kitchen, with a sign explaining the layout of the structure. There was also a bakery adjacent to it.
A fireplace and some kitchen utensils on a shelf in the brick-walled kitchen.
As I was looking around, storms were threatening to roll in. The sky had turned an ominous grey. It began to rain, large drops peltering down, water collecting in open areas. Looking out into the courtyard where a lone bell hung on a post, rain pounded down heavily. That added to charm of the historic site.
As soon as it subsided a little, I resumed my exploration, and decided to climb up the stairs you see at a distance in the picture.
On getting up to the top, you get a great view of the gulf. You also see interesting design details. Original cannons used in the Battle of Mobile Bay during the Civil War still stand on bastions at the corners of the five sided structure.
Turning around, you see another corner overlooking Mobile Bay, where another cannon stands.
A view from the wall of the fort with a cannon atop a bastion.
Stairs leading down from the top into the heart of the bastion.
Arched columns supporting the structure with windows looking into the courtyard and outside.
A sign explains that this was where the powder, shells and shots were stored during the American Civil War, and smaller, insulated, rooms inside these rooms were used to store shells and shots to protect them from the dampness that seeped in from the bricks.
There are interconnecting brick lined tunnels, this one connecting to the courtyard.
Stepping out into the open from the tunnel, brick walls with windows that have witnessed so much history stand mute.
Looking back into the tunnel from the courtyard. The design is so intriguing.
In the courtyard, is the huge anchor from USS Hartford. In the background are two original brick buildings.
There is a blacksmith's workroom nearby where a blacksmith demonstrates his skills to visitors who ask for a tour. Historic reenactment events are also regularly held at the fort. Here, a cannon shot had just been fired after one such event.
The fort is threatened by tropical storms, hurricanes and also sand dune erosion. It is listed as one of the top eleven endangered historic battlefields from the American Civil War period.


