Wednesday, March 29, 2017

Carrot variations

It was my first successful attempt at growing carrots this year. For about 3 weeks, I kept harvesting a good amount of them, and got to see some interesting aspects of home grown, organic carrots.

My first harvest was exhilarating! I picked five carrots to see if they were ready!

Harvesting Carrots

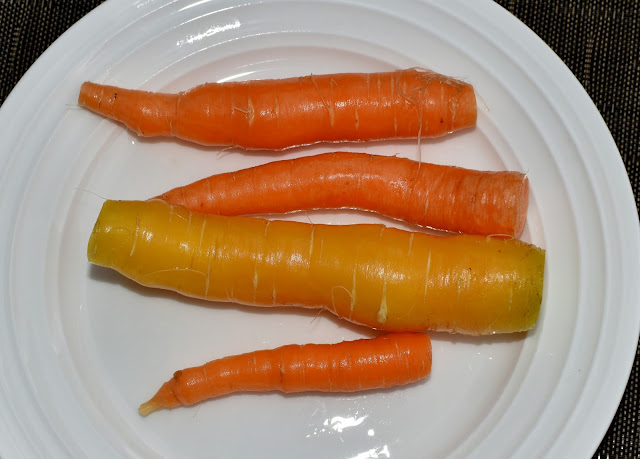
After about a week, I pulled another 4 to add to a salad. One of them was a nice yellow instead of orange like all the others were. A different kind of pigment maybe. It tasted just as great though! Loved the variation!

Harvesting Carrots- color variations

The next week, I decided to pull a lot of them and ended up with a nice harvest!

Harvesting Carrots

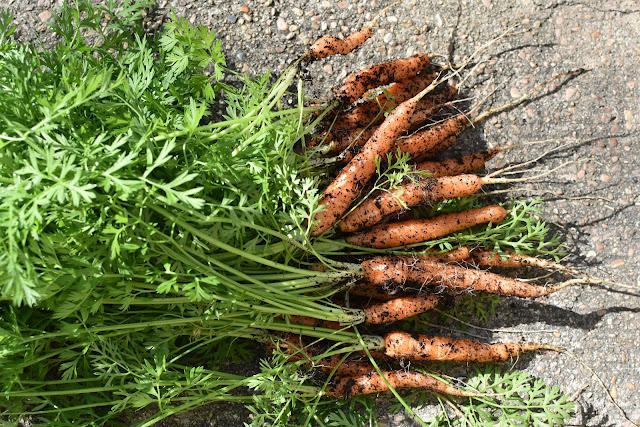
A nice bunch of freshly picked and washed carrots is such a joy to hold and behold! And consume eventually!

Carrots harvest

This was the last of my carrots, pulled about a week after the bunch above. Another good yield! Another diverse range of shapes and sizes! It was delightful to watch these grow and mature, from seeds to plants, and then getting to enjoy them on the table, adding flavor to a variety of dishes!

Carrots harvest

Sunday, March 26, 2017

Grape Hyacinth update

Gorgeous blue Grape Hyacinths added color to my yard earlier this spring. They were tiny plants but packed a nice punch.

Grape Hyacinth- starting to bloom

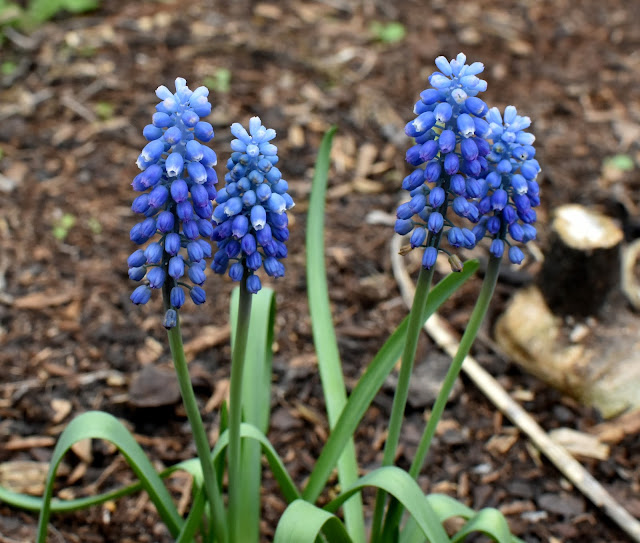
By the end of February, the inflorescence had bloomed fully and a variety of shades of blue were on display!

Grape Hyacinth- in full bloom

Grape Hyacinth- in full bloom

Then the flowers dried up and in a few days, I saw these pods develop, clearly displaying trimerous symmetry. It was lovely to see this next step in the life cycle.

Grape Hyacinth- pods with trimerous symmetry

Another couple of weeks, and the pods began to dry. Black spots indicated seeds forming inside.

Grape Hyacinth- pods drying up

Almost brown now after about another week, some of the pods were open and the seeds were dispersed already.

Grape Hyacinth- pods with seeds

I collected a couple of them to save, in case I needed to plant some next spring. I find the dried pods so beautiful! They are so tiny, you can easily miss them! The color isn't eye- catching either. You get to see the delicate elegance only if you look very closely. How many pretty things around us do we miss seeing!

Grape Hyacinth- pods with seeds

Wednesday, March 15, 2017

Carotene fix!

Several years ago, I had tried growing carrots in the yard. I didn't have raised beds back then, nor was soil as loose as it is now. They were not planted at a good time either. I ended up with one lone carrot, really tiny, and the color wasn't great. Totally disheartened, I decided carrot growing was not for me and did not try it again, until this season.

Late in December, I spent a day in the garden and decided to try plant a few kind of seeds. Job done, I waited for green to show up. Carrots were the earliest to spring up! And then came the freeze! I know I keep talking about the big freeze, but along the Texas coast, a bad one like that comes once in a while, and does some significant damage. I had covered the carrots with an old sheet, and to my delight, the seedlings looked fine when it finally warmed up and the sun was shining again.

By the first week of February, they seemed to be doing well.

Growing carrots- seedlings- one month old

This year, February was a lot warmer than it has normally been, and the carrot leaves looked a lush green.

Growing carrots- plants in raised beds

Carrot leaves in the foreground and radishes at the back.

Growing carrots- plants in raised beds

The green color was so fresh and so spring like! This was early March, in the first week.

Growing carrots- plants in raised beds

Finally, yesterday, March 14, I decided to see if I could see a carrot peeping out. No luck there! Then I decided to dig around a bit, and yes, some carrots looked orange and ready to be pulled!


Success finally!

Growing carrots- harvest

Five were ready, and I decided they were enough for our salad today!

Growing carrots- harvest

It was really heartening to see fresh carrots right 'off the boat' (pardon the expression), but it was a truly gratifying experience!

Growing carrots- fresh harvest

All washed and ready to be crunched on!

Growing carrots- fresh harvest

Grow carrots in the yard- check! 

Monday, March 13, 2017

Growing potates

Growing potatoes is an easy thing to do, I was told, and the sentiment echoed on several gardening forums online. I usually get organic potatoes from Whole Foods, and when they were on sale one day in December, I got an extra pound so I could plant them. As it happened, I had to use most of them, and one got left behind that I forgot about. December was a busy month. When I finally got a moment by the end of the month, I found this spud sitting there in a dark spot, waiting to be discovered. 'Chitting' had already begun, and the eyes looked like they were ready to grow.

Growing Red potatoes- spud with eyes

There was a spot in one of the raised bed that I decided to use. I cut the potato into three parts and planted those at the bottom of the bed, moving some soil to the side. I would use this soil to 'hill' the plants as they grew.
As I read more about growing potatoes, I came across the term 'hilling'. There are several YouTube videos that describe the method in detail. It is also called 'earthing up'. Some people swear by it, and others feel using the method does not necessarily increase the yield.

Then the big freeze hit the Texas gulf coast in the first week of January for three nights in a row, and temperatures dipped to 20 degrees F overnight. I had covered most of my raised beds with Plankets I had found at Costco last year, but I wasn't very hopeful any of my plants would survive such an onslaught of cold temperatures.
Surprisingly, by the end of January, I found lots of leaves growing, which I first mistook for weeds.

Growing Red potatoes- fresh leaves

I did fill in soil at the roots as they do in hilling, and repeated the process three times in all, as the plants grew.

Finally, last week, I saw some of the leaves had started to turn yellow. When the leaves look like that, it means the potatoes are ready.

Growing Red potatoes- leaves turning yellow, ready to harvest

This morning I decided to dig around a little to see what was going on in the soil. A big potato lay just below the surface! So I dug around some more, and found several more. Success!

Growing Red potatoes - harvesting

It was not a bad harvest from just one potato! They look so fresh! I plan to cook them tonight.

Red potatoes harvest

I will try to grow white potatoes soon, without hilling, and compare how the method fares. 

Saturday, March 11, 2017

More succulents

Spring is here and as always the gardening bug makes me want to go outside a lot more than usual. I love the mild weather we have this time of the year. It is also peak season to make sure your seeds are in the ground or are being transplanted.
On the Facebook page of fellow gardeners from the area, I read that a nearby nursery had success in growing a plant from seed, a plant that is hard to find. I decided to drive there after scheduling a visit. Fred Reyes Greenhouses, Inc. is not very far from where I live, and they are wholesale suppliers of plants to nearby businesses. A very friendly cat greeted me when I got there, and after I introduced myself to the owner, she gave me the plant I had made the trip for. I was very intrigued by the place and she encouraged me to look around the greenhouses. It was a very impressive setup, and I got to see how seeds are started, and then transplanted. Trays of tiny seed starters, barely an inch tall, appeared like mats of very young flowering plants, which were being readied to send to other nurseries. It turned out to be a fabulous visit. I found myself looking at a wide variety of succulents that I absolutely fell in love with. I chose a few to take home with me.

Back home, a few months ago, I was cleaning out the kitchen, and found some bowls that I no longer needed. They were colorful and in good shape. I had recently seen an article about a lady growing a succulent garden using her old ceramic bowls. What I needed was a ceramic drill bit that could drill a draining hole in the bowls. We ordered a set of ceramic drill bits.

It was exciting to get the bowls succulent-ready! The drill bit worked just fine, and as I got the soil ready, mixing perlite and sand into it, my husband drilled holes into the bottom of the bowls.

Ceramic drill bit- to make drain holes in a bowl

I then set out to settle these new additions into their new homes. All of them came in tiny 2 inch plastic tubs. They are just babies and will grow under my care.

The first one was this gorgeously colored Sedum japonicum called 'Tokyo Sun'. The bright indigo bowl seemed to contrast well with it.

Sedum japonicum 'Tokyo Sun'

Another Sedum variety called Sedum morganianum, with light jade green plump leaves. It is also called Sedum burrito, or 'Donkey's Tail' It should eventually cascade down the edges of the planter.

Sedum morganianum or Sedum burrito, or 'Donkey's Tail'

I instantly fell in love with this variety of Sempurvivum. The tightly packed concentric whorls of foliage were beautiful! It already had a pup growing alongside.

Sempurvivum

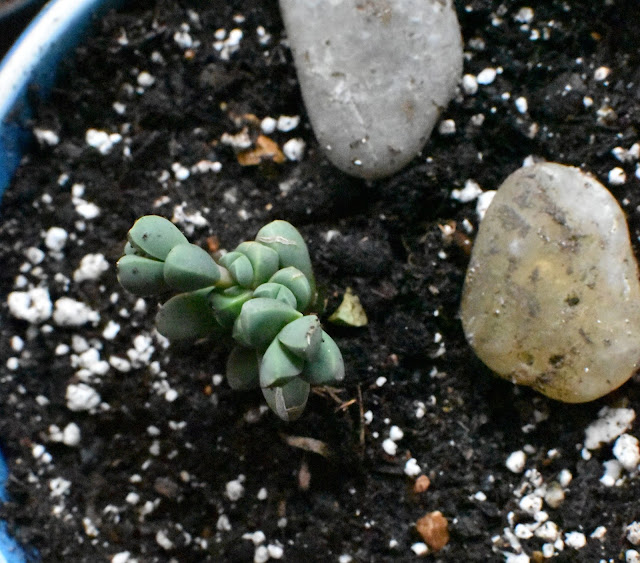
This interesting looking foliage is that of Argyroderma patens. I had never seen a specimen of this kind earlier. I look forward to seeing how it grows, and how the leaves divide and develop.

Argyroderma patens

I got this tiny pup of the Zebra cactus or Haworthia attenuata. It has still not developed roots and I hope it survives. Right now, it is barely two inches tall.

Haworthia attenuata

Sedum adolphii is my tentative identification of this one. I will keep an eye on leaf color as it grows, but I hope it stays fresh green like it is now. Inspired by a picture of a terrarium, this glass jar was used, but I wanted the plant to be outside the jar mingling with the elements. I am keeping my fingers crossed and hope it doesn't fuss because its negatively phototropic roots not in total darkness.

Sedum adolphii

This one is Sedum rubrotinctum 'Pork and Beans', and it brought back memories from years ago. While I was in college, I had a nice collection of succulents and was very proud of it. This variety had been a new addition to my garden, when, one evening, we had some guests. Their 5 year old daughter had a sibling rivalry moment. She thought her younger sister was getting all the attention. She stomped outside and plucked all the leaves of my lusciously growing beauty and spread them all over! I tried hard to revive it for days after the incident but it never did. I hope I have better luck this time!

Sedum rubrotinctum 'Pork and Beans'

I have had this Echinopsis species for the long time. It survived the freeze and continues to grow out of a tiny planter. I will try moving it to a slightly bigger one soon. It has never flowered, and I am not sure I have identified it correctly.


I have added some cool new succulents to my collection. I hope to find more interesting ones in the future.