Showing posts with label Arts and Crafts/DIY. Show all posts

Saturday, August 25, 2018

Pencil Drawings

It was by accident that I discovered the joy of pencil drawing. Here are a few of the drawings I have done in the past three months. I would appreciate feedback.
This one of Half Dome from Yosemite is my most recent endeavor. More about it at the end of this post. 

Pencil Drawing - Half Dome from Glacier Point, Yosemite

A friend needed this sketch to be drawn for an important event in her family. She called to ask if I would do it for her. I was skeptical and confessed to her that drawing faces was a very challenging task for me and that I would end up ruining it. She was persistent and very encouraging, she insisted she had a plan B in place in case this attempt did not work out.
Very hesitantly, I started out. She wanted it on canvas, and erasing lines on canvas wasn't easy. Slowly, it began to take shape, and very soon, I realized I was enjoying it immensely!
This was the result, Krishna with a flute. My friend was very pleased with the drawing and thanked me profusely. What she did not realize was that she had opened a door for me that I never knew existed! I shall forever be grateful to her for coaxing me into trying something new.

Pencil Drawing- Krishna with flute- on canvas

I was bitten by the bug of pencil drawing. I had a couple of extra canvases. I decided to turn to YouTube to check out tutorial videos. This lighthouse was from one such video. YouTube is such a great resource to learn new skills. I thank the artist for uploading such a fabulous video.  
I found this process of drawing so meditative! 

Pencil Drawing- Lighthouse

Lighthouses are very dear to me. I have written about 20 of them earlier on this blog here, here, and here. This one below was a picture I found of the internet. It is a beautiful lighthouse at Kovalam, in the state of Kerala in India. This canvas was to be a gift to someone from India, so I chose this lighthouse. Again, it was a very enjoyable experience figuring out how to adapt the technique to reproduce a photograph.
At about this time, an artist friend told me that generally, pencils are not used on canvas. As much as I had enjoyed doing these drawings, I decided to buy some drawing paper from the art store. Michaels, here I come!

Pencil Drawing- Lighthouse at Kovalam, Kerala, India

The Bass Harbor Lighthouse at Acadia National Park in Maine, was my first drawing on paper, and what a difference it made, in the ease of execution. This drawing is again from a photo I had taken, and I see there is room for improvement when I take this one on again.

Pencil Drawing- Bass Harbor Lighthouse at Acadia National Park, Maine

This historic landmark from Goa, India- Our Lady of the Immaculate Conception Church at Panaji, was my next project. Growing up in the city of Panaji makes this monument a dear subject and I thoroughly enjoyed working on this one. I have learned so much from every one of these drawings.

Pencil Drawing- Our Lady of the Immaculate Conception Church, Goa, India

After drawing buildings for a while, I decided to take another look at YouTube tutorials for pencil drawings, and found this beautiful beach front drawing tutorial. It was such a pleasure to learn new techniques, and managing to get some of the effects explained in the tutorials that I was seeking to bring into my work. Thanks to these wonderful artists for sharing their knowledge!

Pencil Drawing- Beach front

Another historic place of worship from Goa, India is the Shri. Shantadurga temple, Kavle, Goa. These old temples have a beautiful structure called 'Deep Mal (दीप माळ)' or 'Deep Stambh (दीप स्तंभ)' or 'Pillar of Lights', in the courtyard in front of the main temple. They are illuminated on special occasions and are fascinating architectural elements. This drawing is from a photograph I took when I visited, and shows the water tank in the foreground, with a Tulasi vrindavan in it.

Pencil Drawing- Shri Shantadurga Temple, Kavle, Goa, India

As I move back and forth between architectural stunners and natural ones, Yosemite cannot be left behind. I was mesmerized by the granite wonders at the valley and had written about them here
Here is Half Dome as seen from Glacier Point. This majestic structure and Clouds Rest right behind it (the name does not disappoint, clouds are almost always around it), just beckoned me to try drawing them. The clouds in the picture may seem dramatic, but they are just like this in the photograph I took a couple of years ago. 

These are my attempts at pencil drawing in the last three months. It was one of the those art forms that I had previously decided was too hard for me to pursue. There is truth to that adage about not dismissing anything without trying your hand at it. With each of them, I learn something new, and each one of them has given me immense joy. I guess that is the essence of any art form, enjoying the journey.  

Pencil Drawing - Half Dome from Glacier Point, Yosemite

Friday, June 22, 2018

Summer Solstice- 2- Artistic Pursuits

In the past few years, my artistic endeavors have usually happened on a sudden whim in the latter half of the year. Sometimes, the idea has been in the head for even up to a couple of years, and I suddenly happen to find the perfect materials I need for my project. That spurs me into action. These things hardly happen when its cold outside at the beginning of the year.
This year, winter was packing a punch. It was cold, as cold as the Gulf Coast can get. Instead of just bundling up and making plans in the head, I luckily chanced upon a book while on a quick visit to the craft store. It was called Zentangles. I liked what I saw and then found a whole lot of videos on YouTube explaining the concept. I was obviously late to the party and people had been on this bandwagon for a few years now. Nevertheless, I found this to be an exciting discovery. The play of lines and geometric patterns, shading and colors, it was a lot of fun to explore how this genre of art is presented.
I made a frame using the Celtic knot and found it to be so meditative and therapeutic!

Zentangle Celtic Knot frame meditative drawing Sharpie art

This Phicops pattern below reminded me of Foraminifera shells I used to learn about and got a chance to sort, while studying geological oceanography for one semester. One found such intricate designs in what otherwise seemed like grains of sand. While I was at it, I began to realize that pencils were a very interesting medium when you wanted to give a three dimensional effect to a drawing. 

Phicops- Zentangle

Another variation of the Phicops.

Phicops- Zentangle- variation

At about this time, I found a lot of doodling designs. People are so gifted, and so versatile! I decided to try one with my favorite animal, the dolphin. Henna style patterns filled in the shape. I used a gel pen for this small trial in my book.

Doodling Henna Design Dolphin and Baby- meditative art

You will notice that I may have given up Marine Science as a profession a long time ago, but some of it still remains within my being.

This was another random design of a silken cord that I really enjoyed drawing.

Zentangle- Silk cord

At about this time, I was looking for something to gift to some close friends. I hoped this family would like it if I made a custom pieces of art for them. I ended up making two pieces. 
As classical music buffs, I thought they would appreciate an instrument they were learning to play. How I wanted to do this was debated for over two weeks. I might still work on my initial design idea I had in my head! Tune in in a few months to see if I did!
For these two pieces, I used canvas. The canvas was first spray painted with a deep blue paint. Then, acrylic paint and embossed fabric paint was used.

Tablas- Fabric paint Musical instrument art on canvas

My friend being a fashionista of sorts, I figured that my depiction of her passion would be admired. This would be art for her closet!
Here again, I used embossed fabric paint to give depth.  


Jewelry and Accessories -Fabric Paint Art on Canvas- Doodling, Endless Knot motif

Closeups of the two main designs are posted below. I used an endless knot motif on the handbag. It was very reminiscent of the Celtic knot I had done earlier.

Handbag/ Accessories -Fabric Paint Art on Canvas- Endless Knot motif

I used doodling design elements for the necklace. Finding turquoise fabric paint to give a bead like feel in this jewelry was very enjoyable as an artist.

Indian Jewelry design- -Fabric Paint Art on Canvas- Doodling

These are a few pieces I made until the end of March. Going forward, there are so many inspiring art forms that I have begun to explore. More on those later. 

Wednesday, August 9, 2017

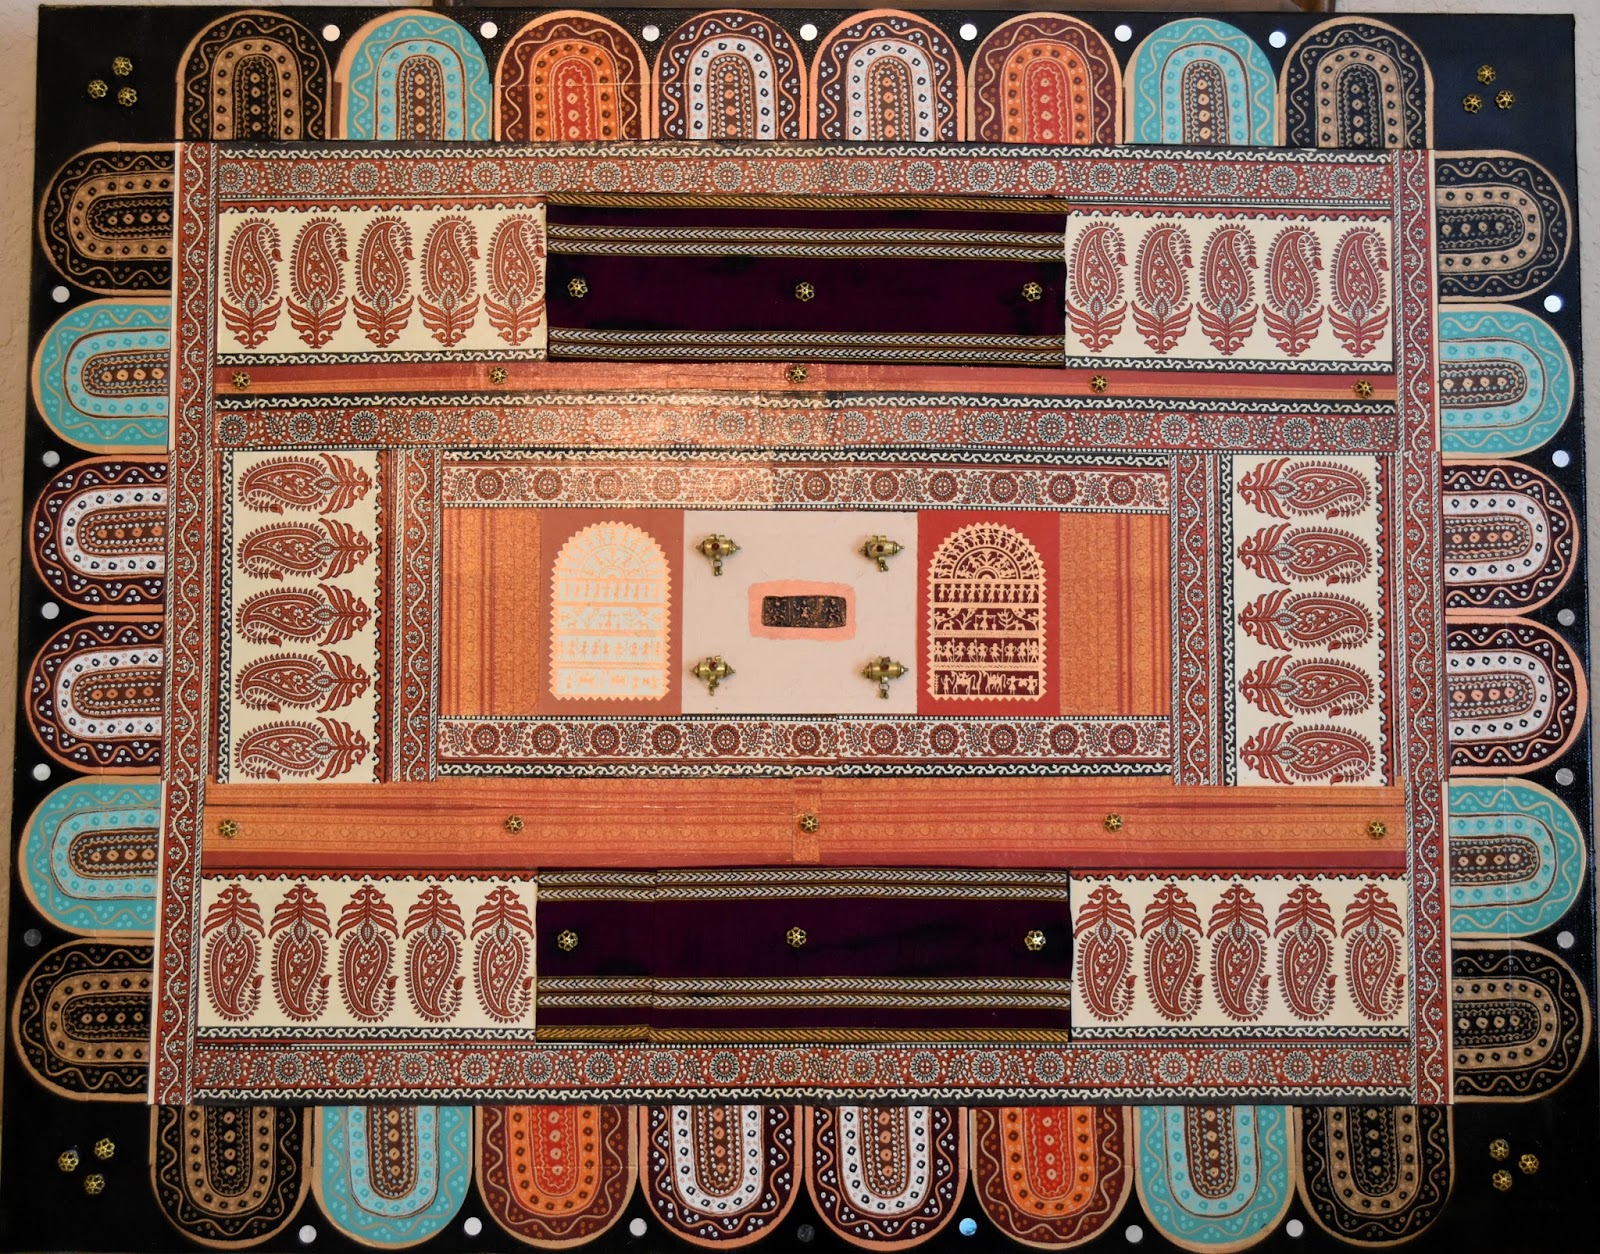
Ethnic Tapestry

Over half the year just sped by. Some home improvement projects were tackled, and completed. In the pipeline for years, they finally got checked off the list, and it was no small feat. Added to it, some health hiccups made sure that the adage of 'ups and downs in life' was adhered to.

Amidst all this, I realized I had not found the time to work on any of the projects that the mind works on when sitting idle. A recent cleaning up drive of the guest room had unearthed some hidden treasures, and I was eager to do something with them.
Stowed away for over ten years now was a stack of some very favorite prints on paper, collected bit by bit on trips to India.


Then there was a piece of cloth a little larger than a scrap, that was bought over 25 years ago, on a road trip with colleagues to attend the wedding of another colleague. At a stopover in Dharwad, a beautiful city in the state of Karnataka, India, I had picked this up, a weave that is known as Dharwadi KhuNn (धारवाडी खण), a specialty of the region.

Dharwadi Khunn (धारवाडी खण)

There were other trinkets and though there was no specific plan on how to use them, I decided to put them all out to see if the creative juices would begin to flow and I could think of something. They did, and an idea started to form in my head.
Armed with my paper trimmer, I cut out the paper prints first. Then as the idea started to take a firm direction, more cutouts were made.

Trimming Paper Prints

Trimming Paper Prints

A preliminary attempt at laying out the design made me realize that there are endless possibilities when it came to arrangement, and I needed to settle down at some point soon.

Laying paper print cutouts on canvas

The base was going to be a 24 inch by 30 inch canvas. It needed to be dark, maybe gold or black. Laying gold paper as a background on one side and black on the other, I got an idea of what it would look like. That was when I decided to have a fusion of materials. I would incorporate the Dharwadi Khunn into the design, because the color and texture would give the project an interesting dimension.


In due course of time, I decided to color the canvas black and the sides, an antique gold. When it was dry, the cutouts went back on it. Notice the arrangement especially on the border was still undergoing changes.


Finally, one was chosen.

Laying out a design is easy. Gluing it all on precisely is a different ballgame altogether! I hoped I would have enough patience until the last bit was glued on. One by one, they all settled in their spots. It took three days for my vision to take shape. There were a few misgivings, but I was pleased with the finished product. The trinkets went up too, in their designated places. My Ethnic Tapestry- as I chose to call it- was ready!

Ethnic Tapestry- Veena

As your life moves ahead, it turns into a tapestry of experiences. A myriad of various colors, hues, and moods. I wanted that to appear on this canvas. 

Tuesday, June 21, 2016

Raised Beds With Cedar Pickets

Last year, I got my first raised bed. It was made by cutting to size a 10 by 2 solid cedar plank that was 16 foot long. The raised bed dimensions were 6 feet by 2 feet. I did not take any picture of it while it was being assembled together or even as soon as it was made. Here is a picture of it at a later date, with plants growing in it. It is strong and sturdy, but after putting it out in the yard, I thought it was small. It served very well last year, with a great crop of cherry tomatoes, peppers, and three different kinds of basil, but I decided to work on increasing the working area when I got more raised beds in future.


This spring, I added one bed identical in size to the one last year.


I also added another raised bed, improvising and getting some more working area out of the cedar plank. This new bed is 4 feet by 4 feet. Sixteen square feet as compared to twelve in each of the above.


These beds are very sturdy and because they are made of cedar, they are untreated and safe to use for vegetables. However, I was looking at a more cost effective way to add more space to the vegetable garden. While at the home improvement store, I chanced upon cedar pickets and decided to build raised beds using them. The cost of the pickets is much lower than that of the sturdy plank, but I am compromising on quality and am not sure how long these beds will last. This is a trial, and here is how I made the beds. 
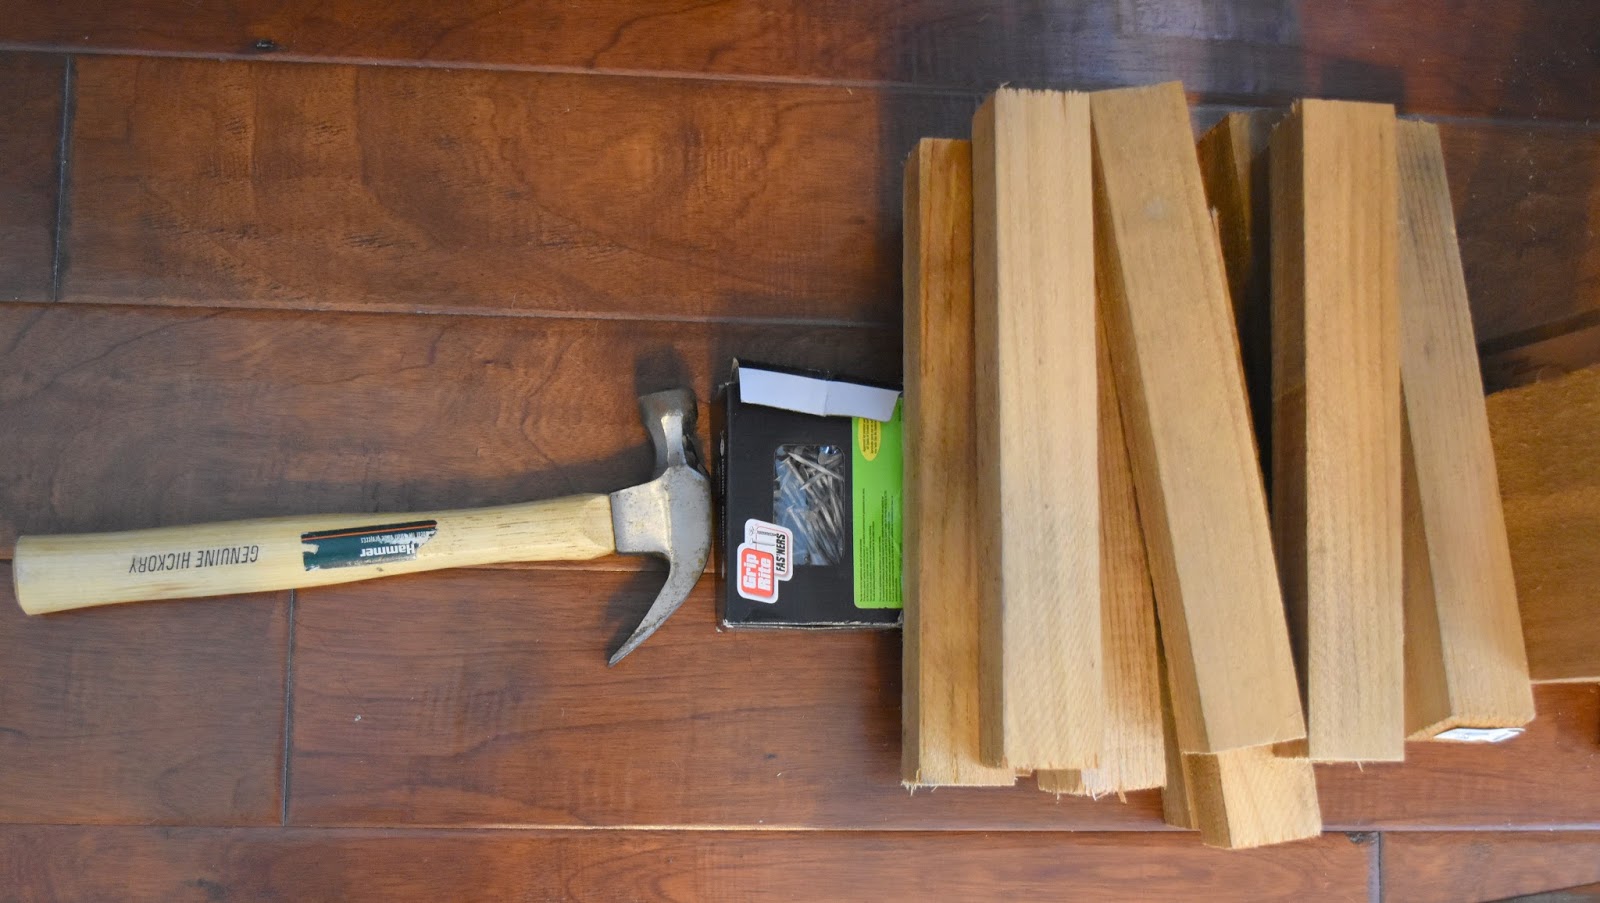
The sizes of pickets available were of two lengths- 6 ft and 8 ft. Both sizes were 6 inches in width. I used galvanized nails and a hammer to assemble the planks together.

Raised bed 1
Two 6 feet cedar pickets, each cut into two pieces of 4 feet and 2 feet 
Bed dimensions- 4 feet by 2 feet, with a height of 6 inches
This is a very basic design and I hope I can get it to work for a couple of years. I will post updates later. 


Raised bed 2- 
Two 8 feet cedar pickets, each one cut into four equal planks of two feet each, yielding 8 pieces
Bed dimensions- 2 feet by 2 feet, with a height of 12 inches

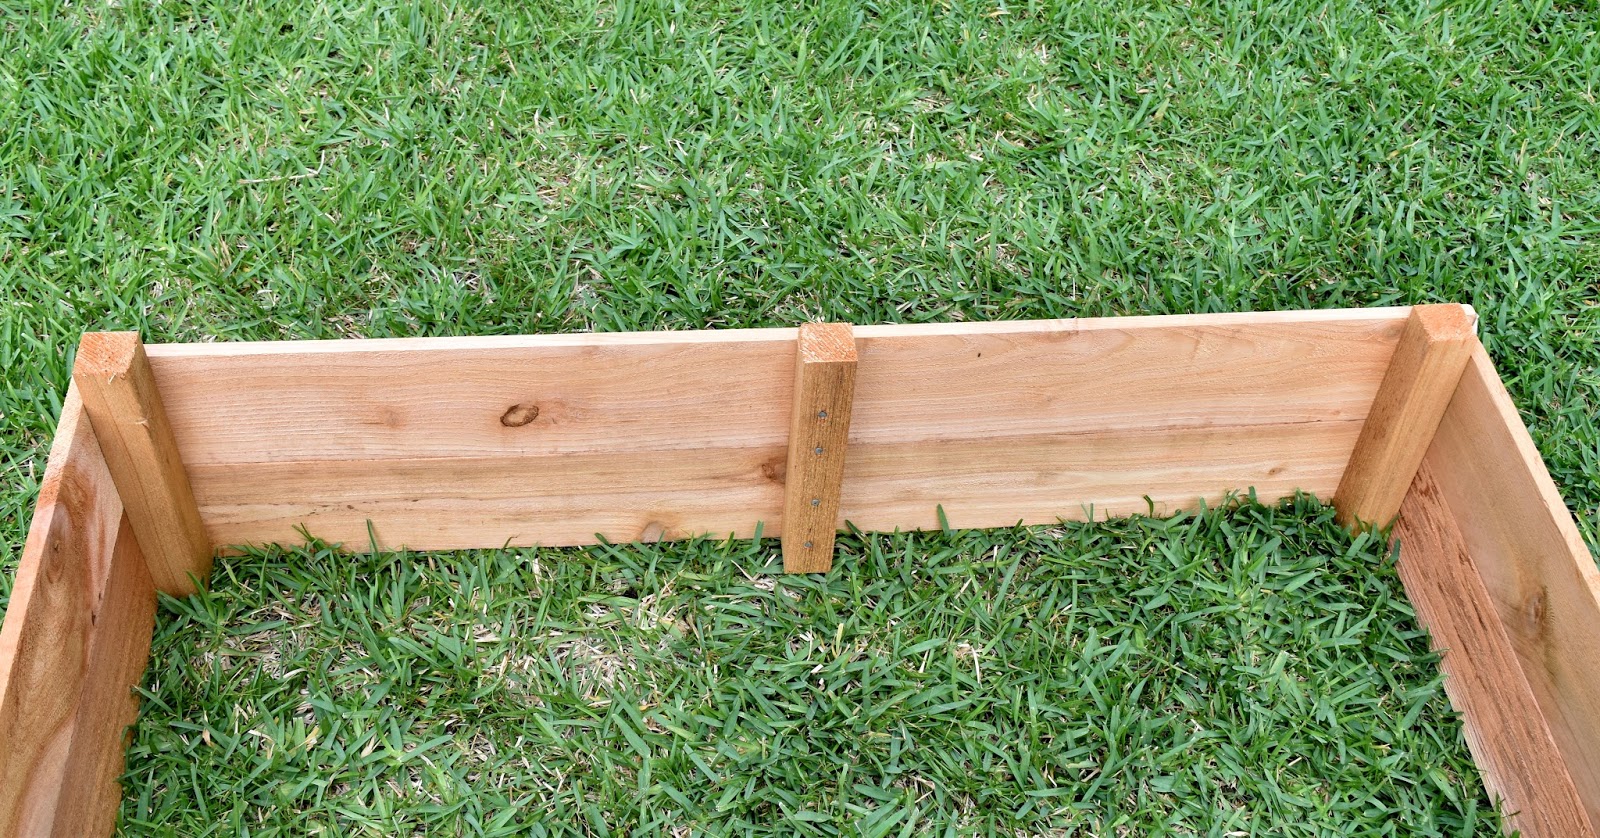
I decided that the new bed would need extra depth than the basic design above, so two pickets were stacked one above the other and stakes were used at the corners to secure the pieces together. 

A twelve foot long 2 by 2 cedar post was cut into twelve pieces of a foot each to use as stakes. 


Assembling the pieces together, securing one plank above another with a stake at either end. Then nailing together the sides on the stake.


The finished product.


The bed placed in the yard and filled with soil. Notice the difference in the thickness of the cedar. The sturdy cedar plank bed is twice as thick as the one made with pickets. It is a couple of inches deeper than the older raised bed though. 


Raised bed 3- 
Two 8 feet cedar pickets cut into half, yielding four 4 feet planks, 
Four 6 foot pickets 
Bed dimensions- 6 feet by 4 feet, with a height of 12 inches 

Two 6 foot pickets placed adjacent to each other and secured by nailing to a stake at either end.
                 

Nailed another stake in the center for additional support.


The finished product, with an area of 24 square feet.


 Close up of the side.


Now to hone in on my gardening skills!